Install and configure a payment module
Merchant Manager provides payment modules that enable you to use a number of different payment gateways. In order to use one or more of these, you first have to set up your merchant account with the payment gateway provider. Once you have done this, you must install the module and configure its settings.
Install and configure a payment module
Uninstall or deactivate a module
The following sections provide general instructions for working with payment modules. For provider-specific information, see the appropriate sections in this Help section. For Shipping Modules, view Managing Orders.
![]() To install and configure a payment module:
To install and configure a payment module:
|
1 |
On the menu, select Orders and then Checkout. A list of the available payment modules displays.
|
|
|
2 |
To install one of the modules, click the module name and then click Install in the right pane. |
|
|
3 |
A number of configuration options, along with detailed explanations of each field, display in the right pane. Complete these fields as appropriate. The following fields are common to all payment modules. For gateway-specific information, refer to the appropriate topics in this Help section: |
|
|
|
Enable this Module |
Select True to enable or False to disable. When a payment module is disabled, users cannot select this as a payment method. |
|
|
This setting allows you to change what is displayed in the Catalog during the checkout process. Ex: "Authorize.net - Simple Integration Method (SIM)" |
|
|
|
Transaction Currency |
Specify the currency your store uses for transactions. By default, the currency specified on the My Store > Currencies page displays. For more information, see Completing the Store Setup Wizard, |
|
|
Payment |
To enable this payment module for a specified zone only, select from the list of defined zones. Otherwise, select None. If the order originates in a zone not specified, this payment module will not be available. |
|
|
Customer Notification |
Sends a transaction confirmation via email to the customer. Select True to enable or False to disable. |
|
|
Merchant Notification |
Sends a transaction confirmation via email to the store owner. Select True to enable or False to disable. |
|
|
Set Order |
Sets the status of the order to the selected state after transaction is processed through this gateway. The default value is Pending. For more information on order status, see Defining Order Statuses. |
|
|
Sort order of display |
Indicates the position in which this payment module will display. For example, a value of "1" will display this at the top of the list of payment modules while a value of "3" will put this in the third position. |
|
|
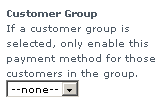
Customer Group |
Allows you to restrict a payment type to only a specific customer group.
|
|
4 |
Click Update to save your settings. |
|
![]() To edit configuration of a payment module:
To edit configuration of a payment module:
|
1 |
On the menu, select Order Manager and then Payment. A list of the supported payment modules displays. |
|
2 |
Click the module name you want to edit. The current configuration settings display in the right pane. |
|
3 |
Click Edit. A number of configuration options, along with detailed explanations of each field, display in the right pane. |
|
4 |
Complete these fields as appropriate. Refer to the information provided to you when you set up your account for specific information. |
|
5 |
Click Update to save your settings. |
![]() To uninstall or disable a payment module:
To uninstall or disable a payment module:
|
1 |
On the menu, select Order Manager and then Payment. A list of the supported payment modules displays. |
|
2 |
Perform one of these actions: - To uninstall the module, click Remove. - To keep the module and the configuration settings but to temporarily disable the module so that customers can not select this payment method, set the Enable option to "False." |
|
3 |
Click Update to save your settings. |