1
Log in to SiteControl, select the Manage Services tab, then Business Center > Sharepoint. Select the SharePoint plan and then click on its Purchase button, or just click Activate (depending on your plan.)
2
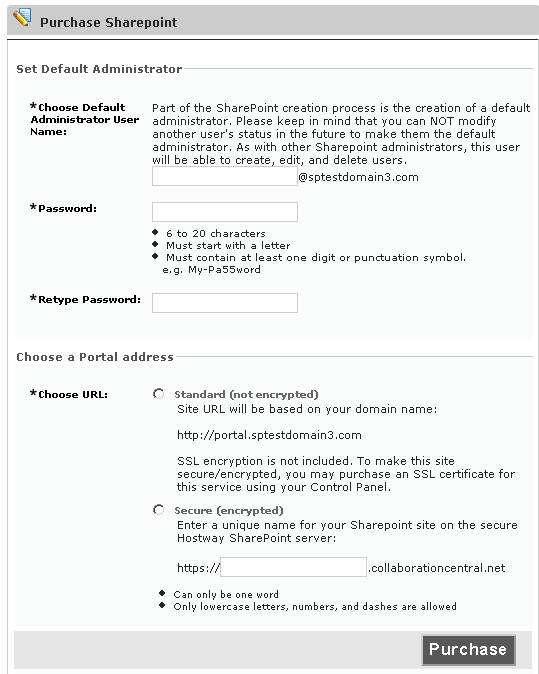
Set the default administrator, choose an address for your portal, and click Purchase.
The first address option is based on your domain name. (ex: http://portal.yourdomain.com), and the security feature of SSL encryption is not included. If you want to use your company's domain name, but also want it to be a secure URL, then you would need to purchase an SSL certificate.
The second option allows you to choose a name for your portal, and the domain will be at collaborationcentral.net -- this option will include SSL, which means that the address will be more secure. Example: You could click on the lower radio button, and type in your company name (all lowercase, one word is recommended, or something like mycompany if there are two words.) If you choose the SSL option, your address for the portal would be something like https://mycompany.collaborationcentral.net.
3
On the Please Authorize screen, click Purchase. The administration screen appears.
4
In the future, you can administer Sharepoint by logging in to SiteControl and selecting
Manage Services > Business Center > Sharepoint.