1
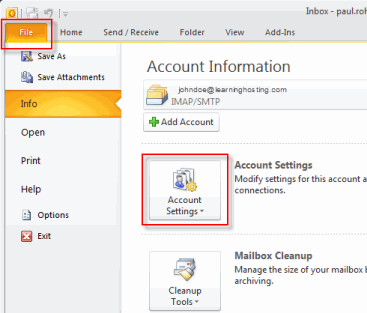
In Outlook 2010, click File tab, followed by Account Settings.
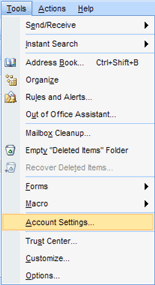
In Outlook 2007, go to the menu bar at the top of the screen and choose Tools > Account Settings.
2
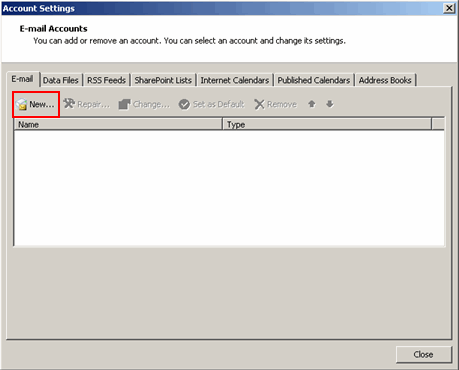
In the Account Settings window, click New.
3
In the Add New E-mail Account window, check the box next to Manually configure server settings or additional server types.
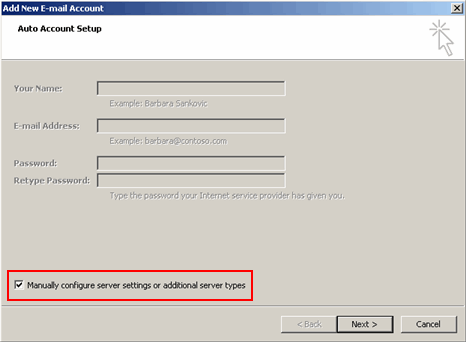
Click Next.
4
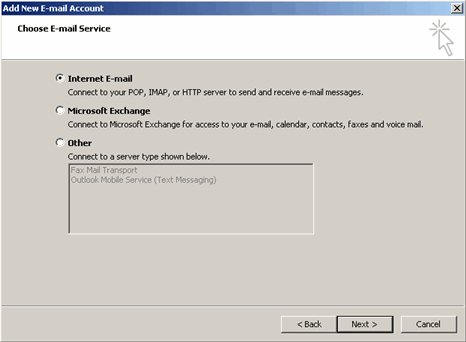
Select Internet E-mail for either POP or IMAP.
5
In the Settings window, let's use a test domain called learninghosting.net
Your Name: Enter your name as you want it to appear, e.g. John Doe
E-mail Address: Enter the e-mail address you created in SiteControl, e.g. johndoe@learninghosting.net
Account Type: POP3 (If you prefer to use IMAP, then ALL settings below still remain the same.)
Incoming mail server: Enter pop.yourdomainname.com, e.g. pop.learninghosting.net
Outgoing mail server: Enter smtp.yourdomainname.com, e.g. smtp.learninghosting.net
User Name: Enter the full e-mail address, e.g. johndoe@learninghosting.net
Password: Enter the password you chose in SiteControl
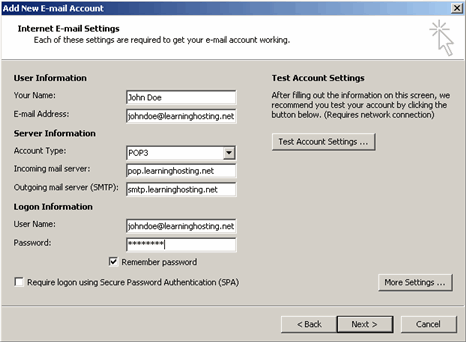
NOTE: Do NOT check the Secure Password Authentication box.
6
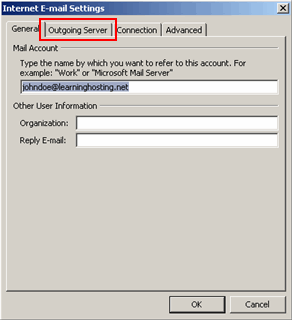
Now click More Settings. In the resulting window, click the Outgoing Server tab.
7
In the Outgoing Server tab, check the box next to My outgoing server requires authentication.
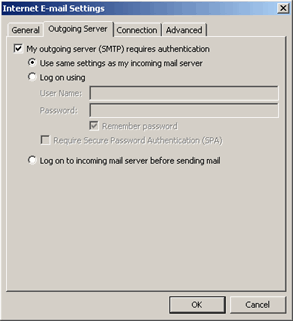
Click OK.
8
Now you should see the Settings window again. To verify the settings, click Test Account Settings.
If you see the following, then the settings are correct; if not, then please review the settings again (and please wait 10-15 minutes after creating the account in SiteControl).
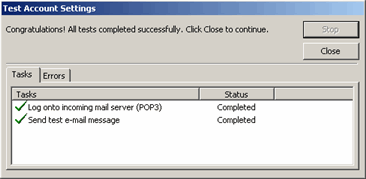
Click Close.
9
Click Next.
You should now see the Congratulations! message.
Click Finish, followed by Close.