![]()
These instructions apply to CuteFTP 7.1. If you are using a different version, consult the product documentation for detailed instructions.
Regardless of which FTP client you decide to use, there is a set of common settings that apply to all clients when uploading the files to the Web hosting server. If your computer is behind a firewall, then you may need to enable Passive Transfer in your client.
Note: The Username and password for uploading files via FTP will be the same as your master username and password.
|
Information |
Description |
|---|---|
|
Host Name |
The Host Name is the name of the location to which you will upload your files and is typically named after your domain name. For example: mydomain.com If your domain name has not fully propagated yet (see the Temporary URL page for more information), then you will need to use the Temporary URL instead of your domain name. You can find the Temporary URL in the home page of SiteControl. Once propagated, you can use the domain name instead of the Temporary URL. If you do not have a FTP client or would prefer to use a Web-based FTP tool, then please use SiteControl's FTP tool. In addition to the convenience of using SiteControl, you also do not have to manually configure the settings as you would on a FTP client. |
|
Host Directory or Directory Path |
The Host Directory or Path is the specific folder in your Web hosting server space that contains all Web-related files (such as html and image files). Also known as the "root" Web folder, the host directory will always be named www. |
|
User Name |
The User Name is the name of the account you use to upload the files. Note: The Username and password for uploading files via FTP will be the same as yourmaster username and password. If you ordered another, separate FTP account, then you may use that also. You can view a list of all your user names and their account types in SiteControl FTP Overview page.
|
|
Password |
This is the password associated with the User Name above. Remember, you must enter it exactly as you had set it in SiteControl. You can reset and change passwords for all your accounts on SiteControl's FTP Overview page. |
CuteFTP is a Windows-based FTP application produced by GlobalScape, Inc. that enables you to transfer files to and from your Web server. You can purchase and download CuteFTP from www.cuteftp.com.
|
|
These instructions apply to CuteFTP 7.1. If you are using a different version, consult the product documentation for detailed instructions. |
![]() To configure and use CuteFTP:
To configure and use CuteFTP:
|
|
You can use an FTP client like CuteFTP to transfer files to a web hosting account hosted on a Linux server. |
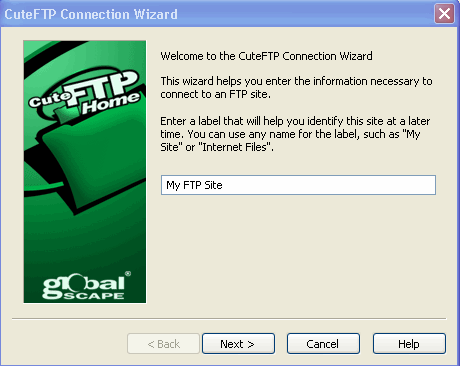
Launch CuteFTP. The FTP Connection Wizard opens.

Enter a descriptive label for your site. This is for identification purposes only. Then, click Next.
Enter your FTP host address. This is your domain name without the www prefix. For example: sampledomain.com
|
|
If it has been less than 72 hours since you set up your account, you may need to use your temporary URL instead of your domain name. You can find this by logging into SiteControl. |
Then, click Next.
Enter your user name. This is your Master User name or the user name for the FTP account created for you in SiteControl. The home page in SiteControl lists both the Master User name and the Master Password.
Enter your password. Then, click Next.
In the Default Local Folder field, enter the full path to the folder on your computer from which you will be transferring your Web site files. Then, click Next.
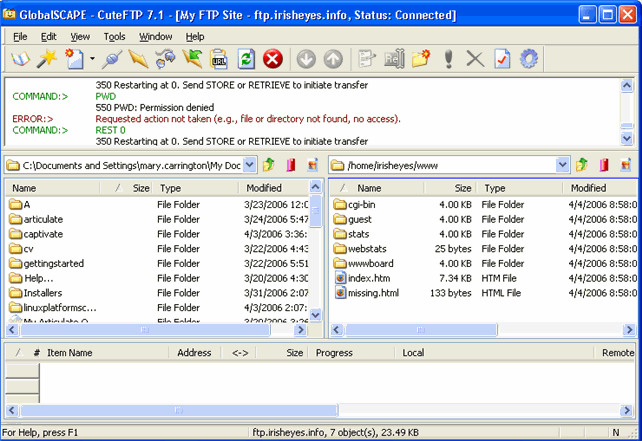
Click Finish. Once CuteFTP establishes a connection to your Web server, the main window displays your local files and the files in your web root directory.

You use the main window to transfer your files to and from your Web server. The main window contains four different panes:
|
Pane |
Description |
|---|---|
|
Log pane |
Displays the commands you send and the server's responses. This information enables you to see when transactions have completed and can assist in troubleshooting. |
|
Local pane |
Displays the files and folders on your hard drive |
|
Remote pane |
Displays the files and folders on the remote server |
|
Queue pane |
Displays the files currently being transferred to the server. If you want to transfer files at a later time, you can store them here temporarily. |
|
|
For more information on using CuteFTP, consult the product documentation available via the Help button at the bottom of the main window. |
![]()